Connecting agents (MCP)
Connect Claude Code, Codex, Cursor, or any MCP client to Tares and ask questions like “what happened to api-server in the last 15 minutes?”. The client discovers the Tares tools and answers from the correlated timeline: logs, metrics, alerts, and findings in one read.
This page is about connecting an external agent that lives in your own infrastructure and can act on your systems. For an agent that runs inside Tares, waking on a trigger to write a finding, see Tares agents.
1. Get your endpoint
The MCP endpoint depends on where Tares runs:
| where Tares runs | your MCP endpoint |
|---|---|
your machine (tares up) | http://localhost:8788/mcp (start the MCP server below first) |
| your own server (compose deployment) | https://<your-domain>/mcp |
| Tares Cloud | shown in your console under Connect; each instance has its own hostname |
Running locally? The daemon alone does not serve /mcp. Start the MCP server as a second process:
tares mcp --transport streamable-http --port 8788 --taresd http://localhost:8787On a server or Tares Cloud instance the MCP server is already running; there is nothing to start.
2. Connect your client
The snippets below use the local endpoint, http://localhost:8788/mcp. Connecting to a server or
Tares Cloud instance? Replace the URL with yours and add the credential from
Authentication. The console’s Connect page generates these exact
commands with the endpoint and token filled in.
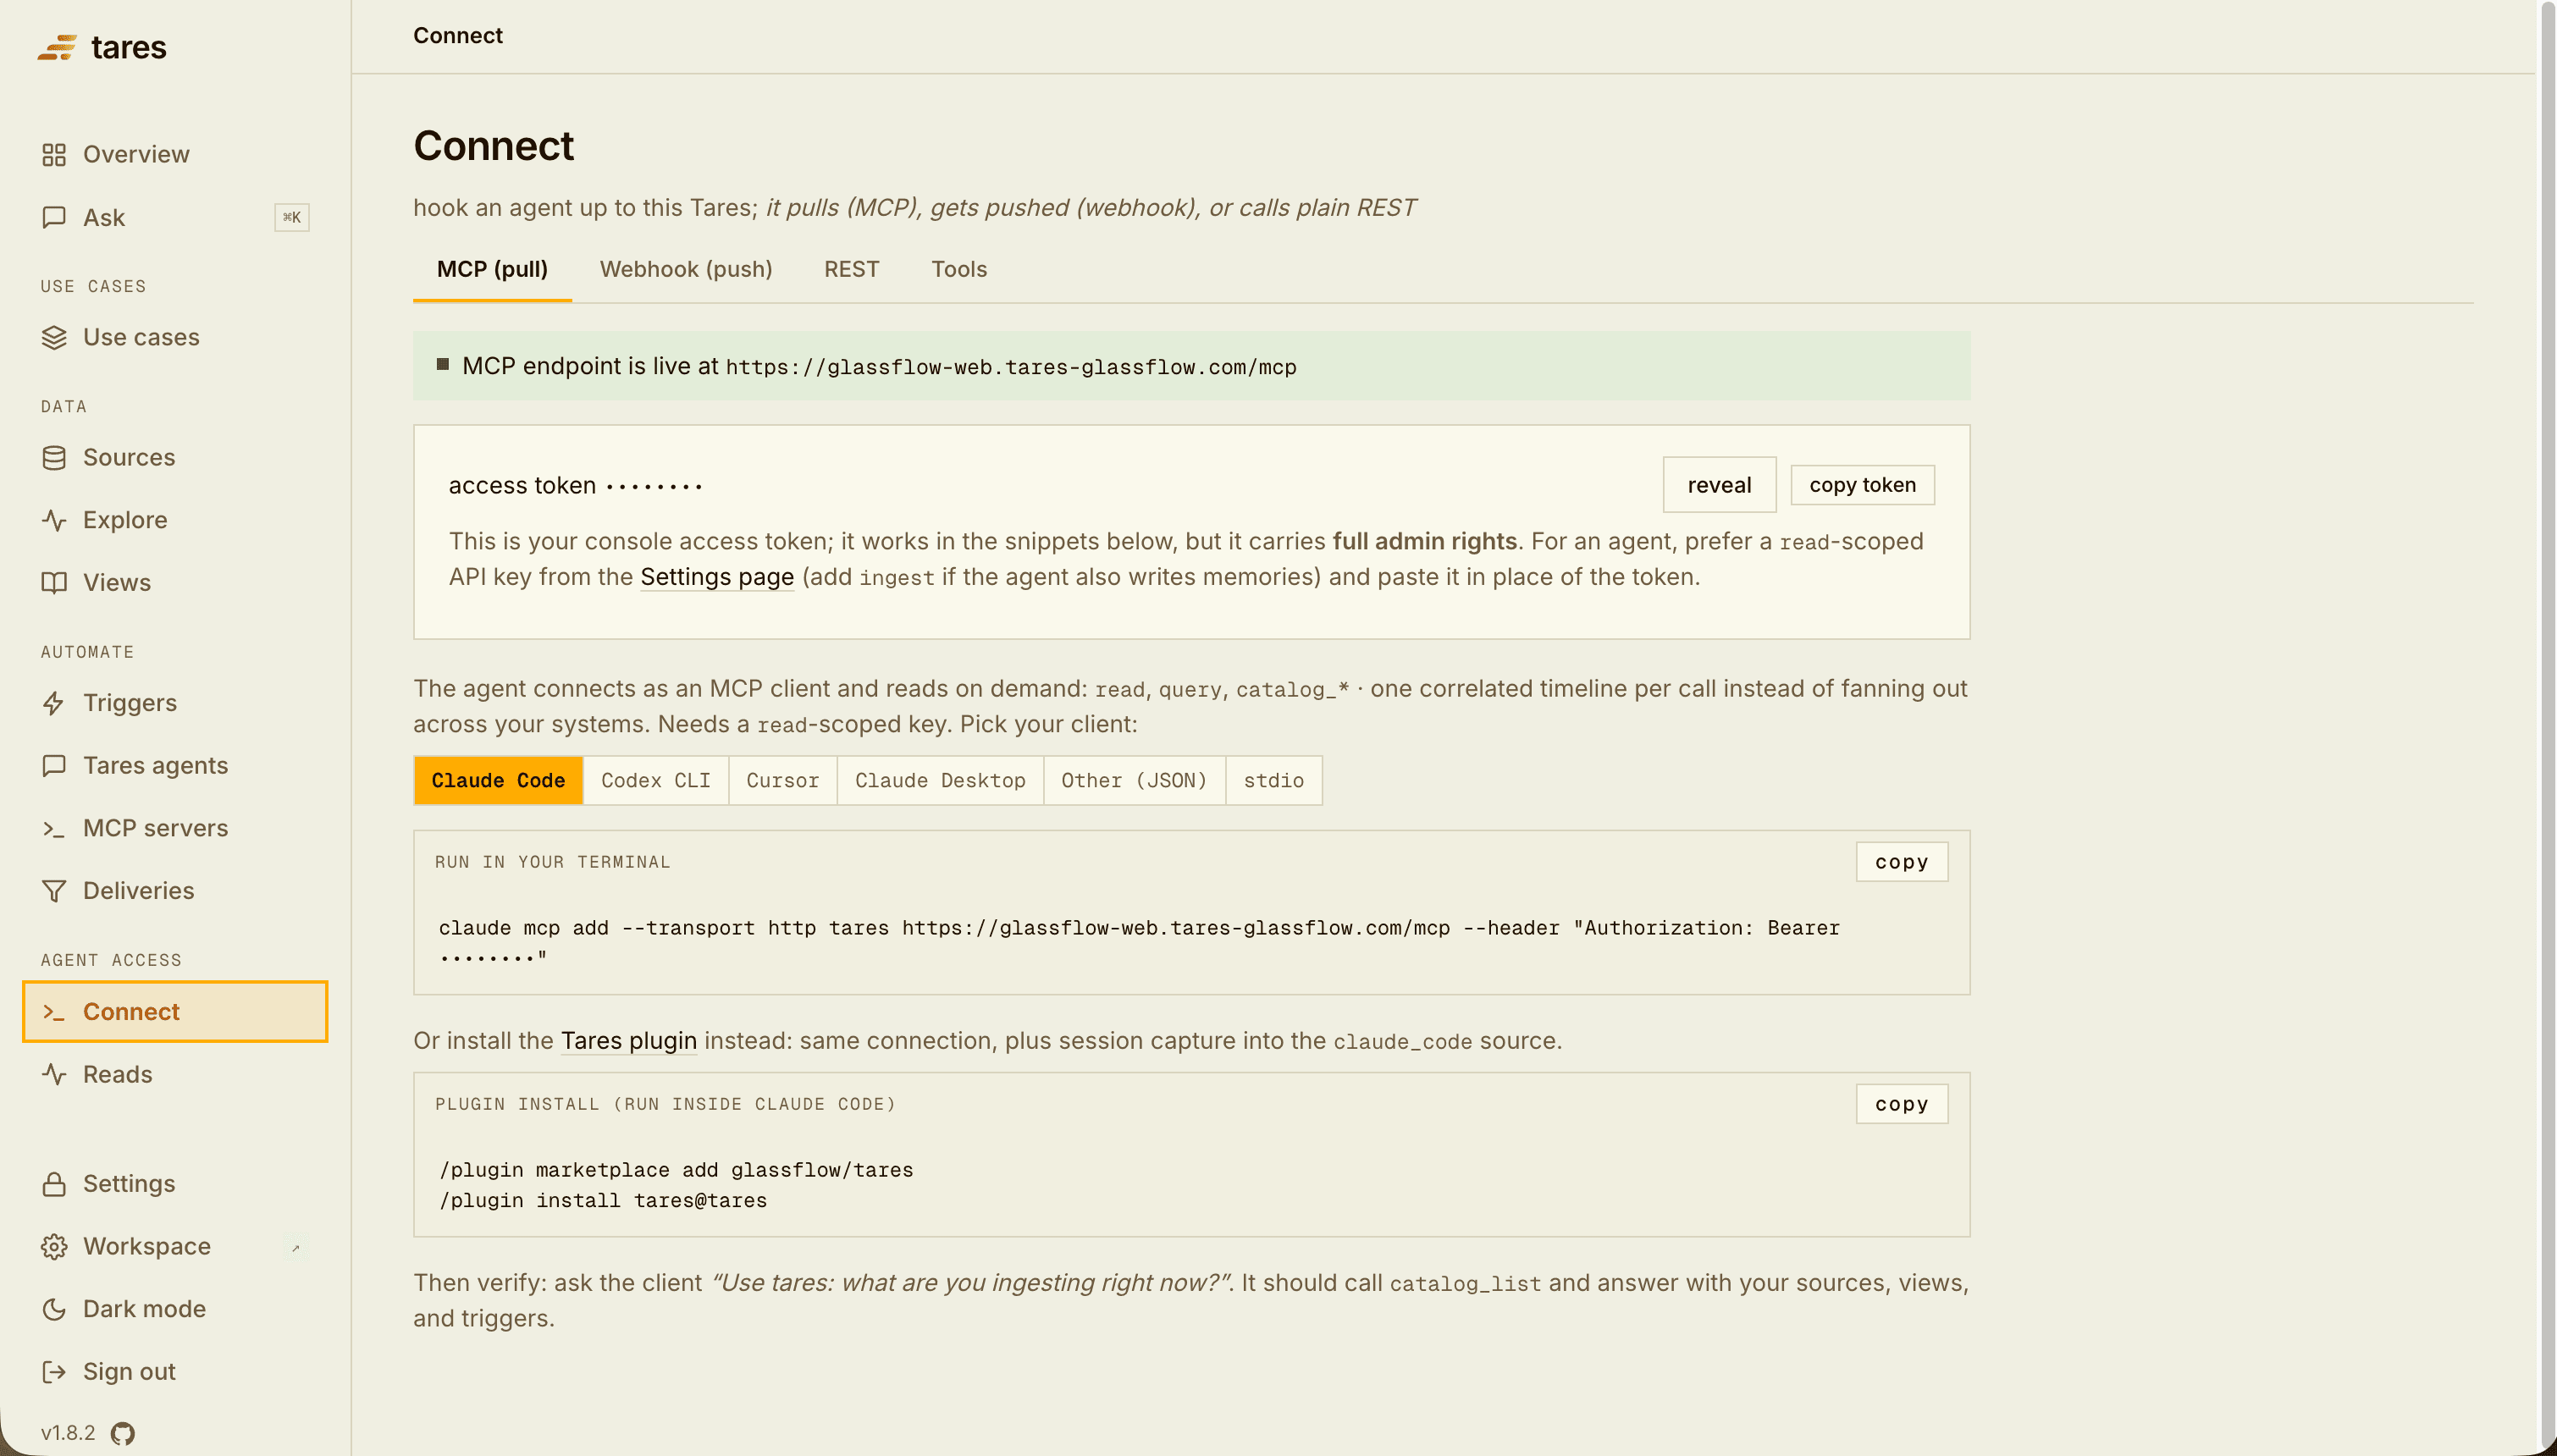
Claude Code (plugin)
The Tares plugin is the default path for Claude Code. One
install wires both directions: the MCP read-back and session capture into the
claude_code source.
/plugin marketplace add glassflow/tares
/plugin install tares@tares
The install prompts for the Tares URL, an optional auth token (stored in the OS keychain), and
a capture toggle. It requires the tares package on PATH (for tares-mcp). To connect without
capturing sessions, use the CLI tab instead.
3. Verify
Ask your client:
Use tares: what are you ingesting right now?
The client should call catalog_list and answer with your sources, views, and triggers. Running
the demo? Ask “what happened to api-server in the last 15 minutes?” and it
answers from the correlated timeline. In the console, Reads lists each read as it
happens, tagged client = mcp.
Authentication
On a secured instance (tares up --auth, every server and
Tares Cloud instance), the MCP surface requires a credential. Prefer a scoped
API key with the read scope over the root token:
- HTTP: the client sends
Authorization: Bearer <api-key>; the server forwards it to the daemon. Each client tab above shows where the header goes. - stdio: set
TARES_AUTH_TOKEN=<api-key>intares-mcp’s environment.
On an open instance (plain tares up), no credential is needed.
Transports
The Tares MCP server supports two transports:
- streamable-http: the MCP server runs as a network endpoint and the client connects over HTTP. This is the default path used above, and the only one for remote instances.
- stdio: the client spawns
tares-mcpas a subprocess; it proxies to the daemon atTARESD_URL. Use it for an agent on the same machine as the daemon when you’d rather not run the HTTP server.tares-mcpis installed with thetarespackage.
The stdio shape for clients that take a config object:
{
  "mcpServers": {
    "tares": {
      "command": "tares-mcp",
      "env": {
        "TARESD_URL": "http://localhost:8787",
        "TARES_AUTH_TOKEN": "<api-key, only on a secured instance>"
      }
    }
  }
}
Or with the Claude Code CLI:
claude mcp add tares \
  --env TARESD_URL=http://localhost:8787 \
  -- tares-mcp
Tools
The MCP server exposes the following tools. A key’s scope determines
which succeed: a read key gets the read surface; writing (ingest, source management) needs the
matching scope.
| tool | kind | description |
|---|---|---|
read | read | a correlated, time-ordered timeline across all sources matching a {label: value} selector (strict AND), no view needed |
query | read | a correlated, time-ordered timeline for an entity through a view; select by key or where |
catalog_list | read | list sources, views, and triggers |
catalog_describe | read | one object’s schema, entities, freshness, lineage, and sample events |
list_sources | read | sources with their config and live health |
list_connectors | read | connector types and their fields |
derive | write | create a view correlating sources for a key_field |
remember | write | write an observation to the agent-memory source |
subscribe | write | register a webhook to be pushed when a trigger fires |
discover_source | setup | introspect an upstream and return a proposed source config |
discover_docker | setup | scan the local Docker environment for sources |
test_source | setup | dry-run a source config without creating it |
create_source | setup | create a source (ingestion starts immediately) |
A typical agent flow: read any entity on the fly; or catalog_list / catalog_describe to learn
what’s there, derive to save a view, query to read it, and remember to write back what it found.
Set up sources with an agent
The setup tools make source configuration conversational: the agent does what you would do in the console form, against the same validation:
Use tares to ingest the
orderstable from my Postgres, keyed bytenant_id.
discover_source: introspects the upstream from partial config and returns a proposed source (for Postgres: readsinformation_schemato pick the cursor and key columns).discover_dockerscans the local Docker environment and proposes one source per running container.test_source: dry-runs the config: fetches sample events without creating anything, so the agent (and you) can check the labels and key before committing.create_source: creates it; ingestion starts immediately, no restart.
Every connector page shows the agent prompt next to the console and YAML forms. Because all paths normalize to the same stored config, a source an agent creates exports to the same catalog YAML as one you click together.
In-app agent
The console includes Ask, the same idea hosted inside Tares: a chat loop on the daemon with the read tools, for exploring or debugging your data without wiring up an external client. Open it under Ask in the console, or summon it anywhere with ⌘K.